April 23, 2018

Teach Your Children Well

I realize I possess a multicolored tool bag filled with an array of objects and experiences. The colors reflect the wide spectrum and are always filled with rays of sunshine. One of those is teaching technology to kindergarten through third-grade students. The term technology takes on many forms, definitions, and ideas. Nowadays when one says technology I believe we all imagine the internet or the world wide web, or even. . . the ubiquitous iPhone. 

The program I taught was an after-school enrichment program with the City of Decatur inside the City Schools of Decatur in Georgia. This is a pretty amazing area to work in, its schools are well funded, well supplied and were once really diverse. The schools have great parent involvement and incredibly dedicated teachers with a supportive administration. I had the pleasure of teaching technology after school from 2010 - 2014. During that time there was a wonderful amount of autonomy to design your program the way that fit your students. 

I taught everything from digital drawing, digital photography, digital video and editing. My students created videos on climate change and living "green" with a Green Screen and then dropped in the background of their choice from their online searches. Our equipment was mostly Apple. The students had access to MacBooks and iPads. I used and got them involved in the Promethean Board for instruction as well. I think my favorite part was introducing a lesson and then letting them go to create as they saw fit. Seeing their imaginations fly. . . that has to be the most colorful tool I have ever seen.

One of the first week's lessons includes a scavenger hunt of sorts. Students have to identity the objects with their corresponding letter and then match what its purpose is. 


First-grade students sharing their ideas about the uses and purposes for the equipment in front of them.

Each class lasted for an hour and a half. Originally designed to accommodate two groups rotating in and out of class, but eventually there were students who were committed to their projects and loved coming so they would stay the entire time. They were allowed to leave if they chose and to have breaks.

January 23, 2018

Do You Remember the Time When We Fell In Love?

There was this time when I received a class with 26 students and 20 of them were boys. An entire ball of energy would emit vibrations of happiness when their teacher would line them up at my classroom door! What does a visual arts teacher do with all of that elementary energy?

TAKE THEM OUTSIDE FOR RECESS! - Just kidding!!!

So I have to admit that I spent a lot of time studying child and adolescent psychology, abnormal psychology and social psychology in undergraduate school. Our professional development team at the school had done a fairly good job of keeping us instructors up to speed on behavior interventions and strategies such as differentiation and understanding learning styles including multiple intelligences.

I'd written my lesson unit and planned my curriculum for this class. I was going to take them on a journey complete with drawing and painting, introducing the Elements and Principles of design with two-dimensional media. Well... let's just say that that lasted a week before I knew I had to retool my plans or else! Because let's face facts -- they were a little naughty. There was no way I'd survive, nor would they on cut paper, watercolor, tempera, and pencil on paper! I had to think fast.

CERAMICS! That's it! "Playdough" they called it. And thus... my first lesson: this is NOT
playdough. It's not mud and it's not dirt. Soooo, the sciences you say? They didn't but... I did!
I used videos and books to explain that clay minerals found in soil - this was tough because it sounds like a contradiction to the idea of dirt. Ohhhh boyyyys. Using examples I was able to let them observe the difference between porcelain, earthenware, and stoneware as well as everyday Georgia dirt and garden soil. I let them touch it, feel it and even suggested they could taste it! To that suggestion, I received a resounding EEEEUUUUW and lots of laughs!

I taught them new words that I kept on the Word Wall like the names of the different clays, plasticity, glazes, chemistry, and structure. I used metaphors and analogies that they could understand, like a Poptart's glaze and why it can withstand a hot toaster, and Koolaid that changes the color and taste of water. They got a kick out of that, and I believe it helped them understand the complex concepts better. I very briefly covered the chemical make-up of each clay mineral, its particle size and how that determines the firing temperature I'd use in the big "oven" AKA kiln, but they were second graders who weren't 100% sure they believed me -- that it wasn't dirt.

It worked... it was my greatest Jedi Mind-trick to date. I introduced them to all kinds of handbuilding techniques primarily because they were really excited about the bodily-kinesthetic activity. I had them use stoneware, primarily because of its durability. All of that energy was harnessed and focused on creating three-dimensional vessels and it turned out to be wonderful lessons for all of us.


November 16, 2017

A Long Time Coming

First, I have such respect for artists who also have other vocations. Ones that inform or inspire their art-making. They, to me, defy all the stereotypes about artists... I had a boss say to me once, "You're just the pretty picture person right?!" He said that -- after I designed and created all of his company's marketing, sales, annual reports, and trade show exhibits! Imagine that?! Okay, so I digress.

M.C. Escher (Dutch) is that kind of artist to me. His father wanted him to be an architect, but he chose to be a graphic artist. He was mathematically brilliant, as is demonstrated in tons of his drawings, prints, and woodcuts. He was fascinated with the Regular Division of the Plane. http://www.mcescher.com/ He was also an illustrator and painter, who created masterfully realistic works as well.

I could have approached the creation of the tessellations in many ways: Tracing Paper Translation- Slide; Tracing Paper Translation- Rotation, but I decided to try the Cut Paper Method (I discovered that an actual teenager came up with it). It's very similar to the Slice Method, but it's a bit simpler, and the resulting shapes are random, which allows the artist more creative freedom in the final results. I tried a few methods, made a couple exemplars, and decided for my students I would also add various instructional devices as well: video, visual diagrams, as well as direct instruction.


The Math Connection
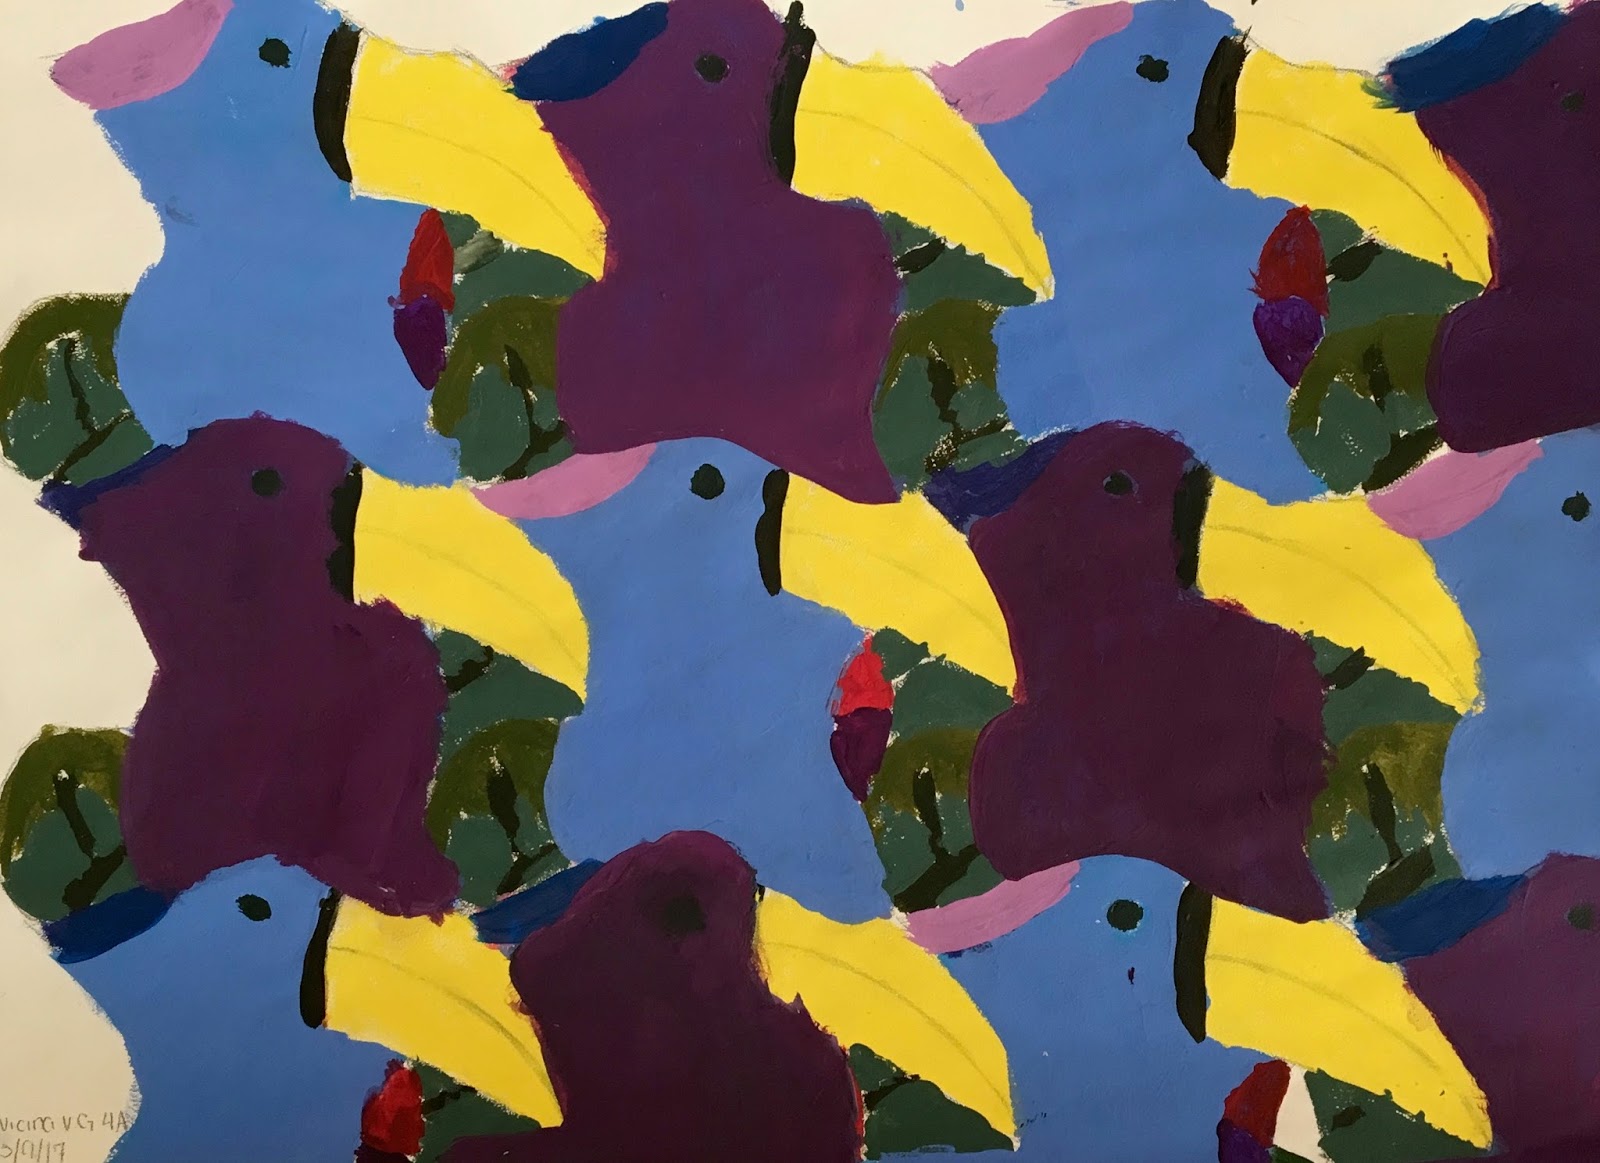
There were two other lesson plans where I’d included geometry where students were required to draw a rhombus, a trapezoid, or an ellipse as a method of seeing the illusion of depth. This lesson was a good segue after having that experience. I asked the students to sketch regular shapes in their sketchbook - just taking it back to the basics - that there are three regular shapes that make up regular tessellations: the equilateral triangle, the square, and the regular hexagon. For a visual example, I showed them how a regular hexagon is used in the pattern of a honeycomb, the nesting structure of the honeybee. However, the artworks -- ah hum…. Tessellations I wanted the students to create were no average semi-regular tessellation! Ours were verrrry irregular with all kinds of convex and concave angles. What I would describe as more organic than geometric, but the math can be found in them.

They got this!
I am very contemplative about my teaching. The average size of my classes was 36, at the highest I had 38 mostly freshman/generalist students. I haven't been able to have a studio-type environment, where I could assign a cerebral challenge and send students off to think creatively to solve the problem, then bring to me sketches that they proudly created and are anxious to share. I'ma be real!
A student finds a rabbit in her tile.
Student using a window to trace repeated design.
I'm a Graphic Designer at Heart... and Practice.
My undergrad degree is a B.F.A. and my first professional experience was as a graphic designer. I often forget how much my education at the Philadelphia College of Art informs my teaching methods and production strategies. After each student created their tile (the kinda easy part), I encouraged them to look carefully at the contour and to imagine what image or images could be congruent with it. Before they could create their large painting with no gaps or overlaps, I had them create thumbnails sketches. Instead of free-drawing their design from tile to tile, I encouraged tracing their image over and over, so that they were interlocked and covered the plane. That was important because, as I explained ". . . most of your tessellations are irregular polygons, not parallelograms, nor equilaterals. . ."

Understanding Color Theory - another important component of the project.
While some students were working on their designs, others would mix colors to paint a color wheel. In addition, they were supposed to choose a complementary color pair, then paint tints and shades in a seven-step scale. This introduced them to low key and high key colors, as well as truly developing a sensitivity to color mixing -- discovering on their own -- "is this really orange? How much red do I need to make this orange and not red-orange?"


I would teach this again, and again. I think my students were challenged and quite proud of the results. Students who finished early were encouraged to repeat their design onto ceiling tiles. That presented an interesting challenge because all ceiling tiles are squares. Nevertheless, for my population of students, this worked as a late second-semester project. I'm not sure I would have presented this fist quarter. However, perhaps I am wrong? Perhaps this could have been the BANG! that set things off and kept them engaged from the start? I'll never know. For now, enjoy their creations.


September 11, 2017

Reduction Junction What's Your Function?

Examples of student's completed prints.
Exemplary example of student research and sketches prior to creating relief print. I required that students chart their short-term and long-term goals, next create thumbnail sketches, then to increase their skill with reading and measuring with a ruler each created a 1:1 drawing of their composition which would then be transferred onto their substrate.


A developing example of student concept development work.


Typically a relief print is created with wood or linoleum, or that rubbery stuff they sell art teachers for students. In this project each student received a foam sheet, on which they traced their composition. Once that step was completed,  they pasted the foam with rubber cement onto cut mat board squares. Then they would cut the recessed areas that would not print on the first pass.
I honestly would not ever suggest this. It sucked up SO MUCH material: foam, rubber cement and mat board. Ridiculous!
Here a student pulls his first prints with the rubbery linoleum substrate (because I ran out of the other supplies). I had approximately 260 Intro students working on this project.


More student prints.


December 16, 2016

Let's Get it Poppin'!

Roy Lichtenstein, Claes Oldenburg, James Rosenquist, and Andy Warhol these are the artists most known for the Pop Art Movement. Emerging in America and in Britain in the late 50s, this art style was impacted by the burgeoning mass culture of a post-war America. My students researched to understand how the politics, economics, and social issues of the mid-century had an impact on the art of the time.

Today's students face just as many societal issues, some that have always been there and others that are polarized due to the widespread access technology. Social Media, political and racial tension, and poverty are increasing. As has been customary, the music of the youth reflects a great deal of their frustrations and aspirations. I asked students to consider Popular Culture today: If they were Andy, Roy or Claes what or who would they paint, print, or sculpt? Most students used the techniques of Lichtenstein and Warhol to create their compositions: projecting the images and tracing lines and shapes in the images. My everyday students really impressed me with their perserverance. This was an end of semester project, where one could really see their learning and progress over that time. Their composition sizes range from 11 x 14" to 18 x 24" and were painted with acrylic on paper, canvas, wood or fabric.

Michael Jackson w Cracked Face, by Honor B.
Commentary on Social Media, by Justin S.


Whitney Houston as a Blond, by Kiera W.
MAC Lipstick soft sculpture (in progress.)

Future, by Christopher G
Jordan by _______________
"Little Boat" by ________________


Painting Jay-Z, by  R. Cherry
Michelle & Barack, by R. Rodriquez


Superstar Jordan, by Quantavius
Dave Chapelle, by Bobby